
The table of contents allows us to automatically create a list of headings and sections under the document. This is helpful (and almost mandatory) in documents with several modules and multiple pages. In addition, when exported to format like PDF or website, the references of the table become clickable links to their sections.
Activity 1: First we identify one or more participants that don’t know how to create a table of content, and ask them to describe the process they’re using to generate an index in their documents. Understanding what is wrong and what can be improved is essential for this training.
To insert a table of contents, we need to go to the References menu and click on Table of Contents.
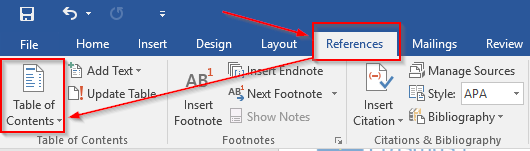
FIGURE 1: INSERTING A TABLE OF CONTENTS
An empty table of contents will appear. To fill it with links, each section of our document has to be titled with a heading. Headings are special paragraphs that identify the different sections of our document, and are used by the TOC to create the reference list. By default, only the three first levels of headings are used to build the TOC. To select a heading level, put the cursor on the title and choose a heading in Home -> Styles.

FIGURE 2: CHOOSING A HEADING
Then we will need to update our table of contents. Click on the TOC we have created and choose Update Table.
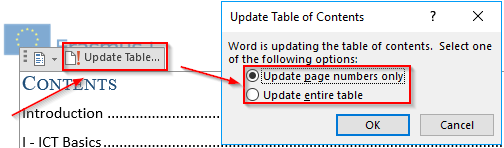
FIGURE 3: UPDATING OUR TABLE OF CONTENTS
Activity 2: Ask the learners to create a table of contents of four levels. Observe their ability to find new information and solve problems to adapt the pace for the rest of the tools.
Similarly, we can create a table of figures for the images and tables we have in our document. This is key in documents where we have inserted multiple diagrams or graphs.
For this, we need to click, for example, on an image, and then click on References -> Insert Caption:

FIGURE 4: INSERT A CAPTION
Then, the following window will open:
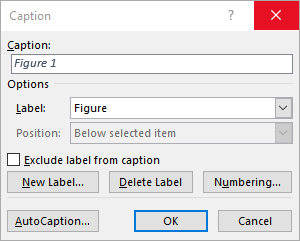
FIGURE 5: INSERT A CAPTION
After we have created at least one caption, we can create a table of figures by going to References -> Insert Table of Figures. This table behaves similarly to the table of contents.
Document Maintenance: Managing Our Bibliography
Activity 3: Ask three or four of the participants to find a small piece of text on the Internet and to put it in the teacher’s computer, and tell them to quote the source. Observe the results and prepare the explanation accordingly.
One of the most useful and yet unused features is the ability to automatically manage the sources of our document and insert citations and bibliography tables.
This allows us to modify and update the sources after we have inserted them, and Word will automatically refresh all of the references in the document. It will also allow us to construct the bibliography automatically, similarly to the table of contents.
To add a citation to our source database we go to References -> Insert Citation:
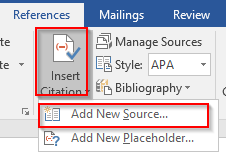
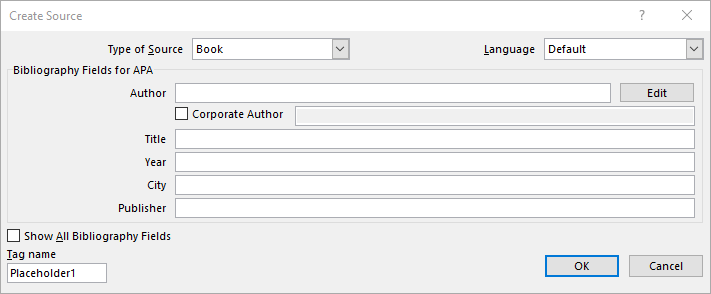
FIGURE 6: INSERTING A NEW CITATION
Here we will be able to add a new citation to our text. In addition, under References -> Style, we can also choose the style we want to use for our citation.
The source will not only be added to the document, but will also be part of the sources of it. At some point, we can create a bibliography by clicking on References -> Bibliography. It will provide a list of sources similar to a table of contents.
Activity 4: Let us check how observative our learners are. Prepare your Plickers cardboards and ask the learners whether we need to know the source to add the citation. Correct answer: NO, as we can add a placeholder from the same menu than we add a new source.
Document Maintenance: Styles
It is obvious that we can format our document the way we want, and completely change the appearance of it from the default style.
We have two ways to do it: the manual way, individually changing the colours, sizes, margins and rest of properties of every chunk of text, or we can define the default style of our document and let Microsoft Word format the content for us.
The advantage is obvious: not only we save a lot of time by not having to edit every paragraph manually, but also it allows us to create templates and reuse the same style for multiple documents. For example, if we want to author the content of a full course and every document has to have the same style, this is the way to go.
Word defines it for each paragraph or section. It already has several default styles for the common parts (titles, headings, footer, etc.) but we can add our own styles.
We find the section to apply and modify the styles under Home -> Styles. If we hover the mouse over one of the styles it will preview in the document how it will look like. If we click on it, it will change the style of the text under the cursor.
To modify the styles, we have to click on the arrow on the left corner of the Styles section.
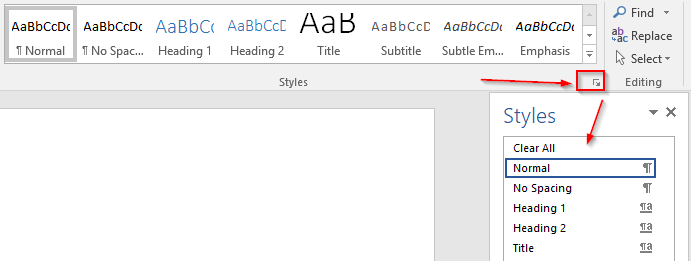
FIGURE 7: APPLYING AND MODIFYING OUR STYLES
Activity 5: Ask the participants to create three hyperlink and change its properties (colour, font size, etc.) by using styles.
Activity 6: Make it even harder: ask them to modify the colour of the already visited hyperlinks. Hint: they will need to show all of the styles.