
Download the freeware here:
https://sourceforge.net/projects/projectlibre/
Watch this to get an impression of the program:
https://www.youtube.com/watch?v=oiVnWX-J5Mo
General information:
- The MS office command “CTRL + z” works to undo commands.
- The handout should simplify the familiarisation with the program. It does not offer a basis for individual problem solving.
- The above steps are described in their processing sequence.
- Do not forget to consider milestones such as: “Project start”, “Project end” and the phase “Project management” in your planning.
Most important functions for our plan:
- Create a project
- Transfer a project schedule for scheduling
- Create milestones
- Create links between phases and milestones
- Determination of the duration of a Work Package (WP)
- Creation of hierarchies
1. Create a project

Enter the Title and the Start Date. Enter “Project Start” in the first cell in row 1.
Insert the name of the project and a start date. Usually, the planning includes the planning phase.
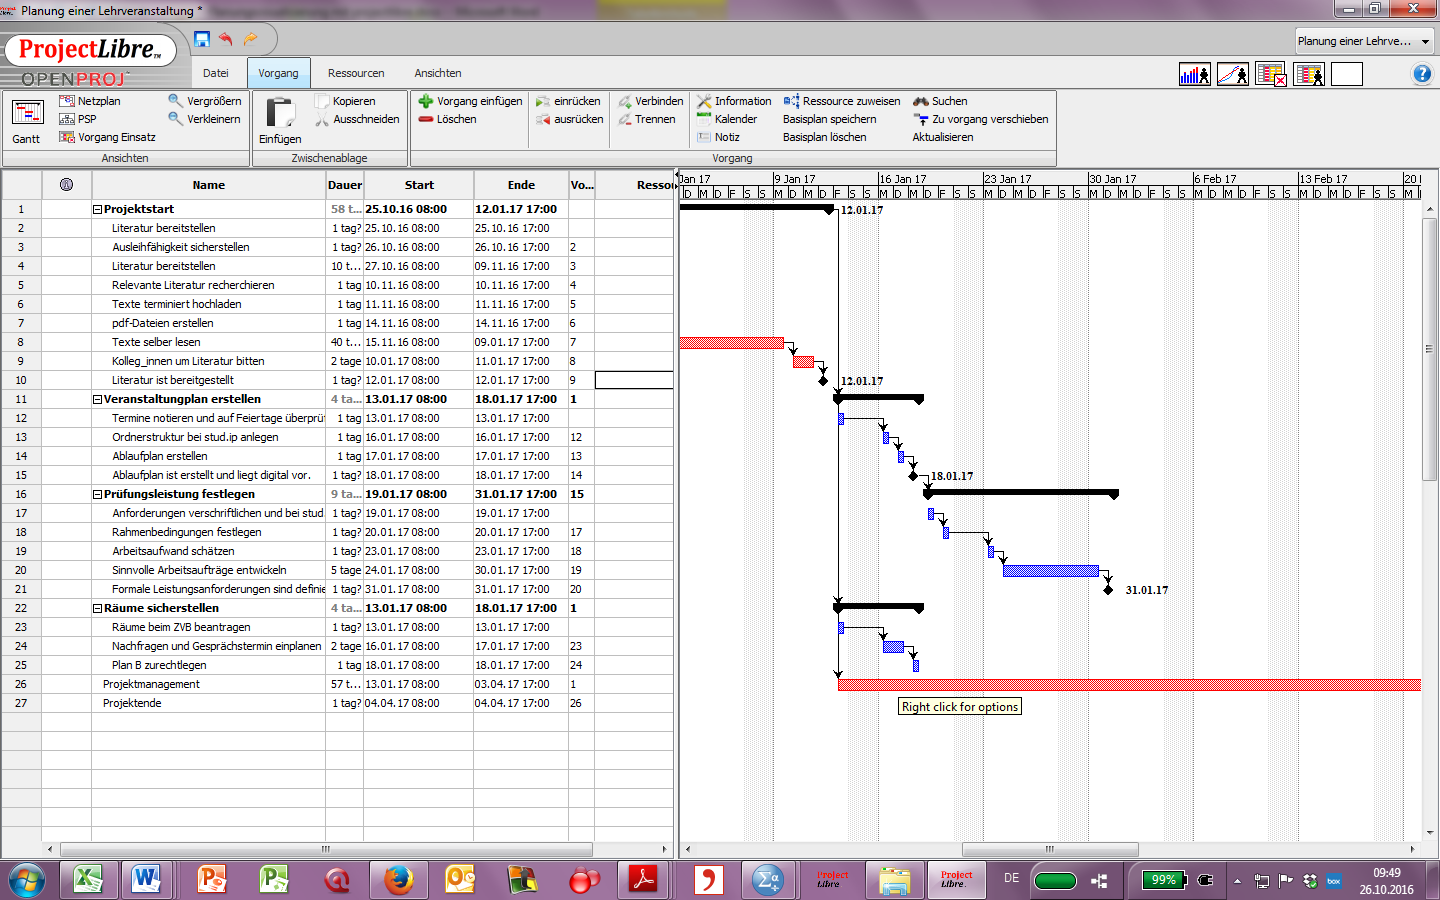
2. Create the Gantt-Chart
Transfer all tasks in their logical sequence, but without dates, to the rows in the “Name” column. If you have forgotten something or if you would like to add something, you can add another line by choosing “Insert Operation”.
Please include a maximum of seven main phases and, related to those, two or three main tasks to do.
Unit 5.1 helps you to decide which tasks you should include.
Main phases are displayed in black.
Main tasks are blue or red.
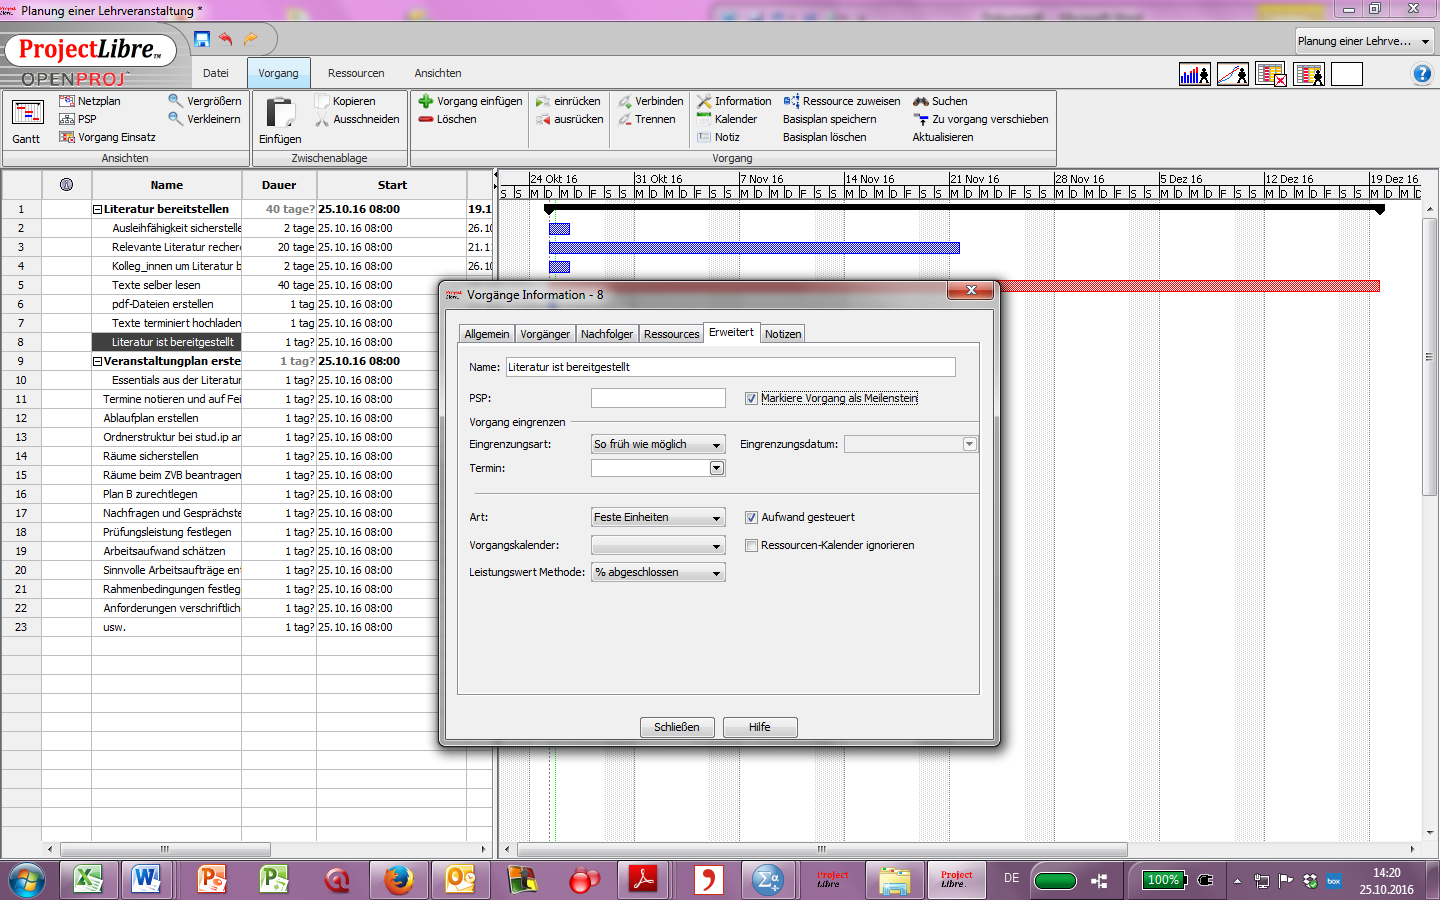
3. Creation of Milestones

Basically, each phase (higher-level operations, the black ones) begins and ends with a milestone. In this respect, there must be at least, as many milestones as there are phases in the project. Other dates that are entered as milestones can also be important. Milestones can be generated by double-clicking on the activity. Click on the “Advanced” tab and select “Display task as Milestone”. If a new operation is required, it can be added via the Insert operation tab. Milestones are always formulated in the past tense and are displayed as black hashes.
4. Creating linkages
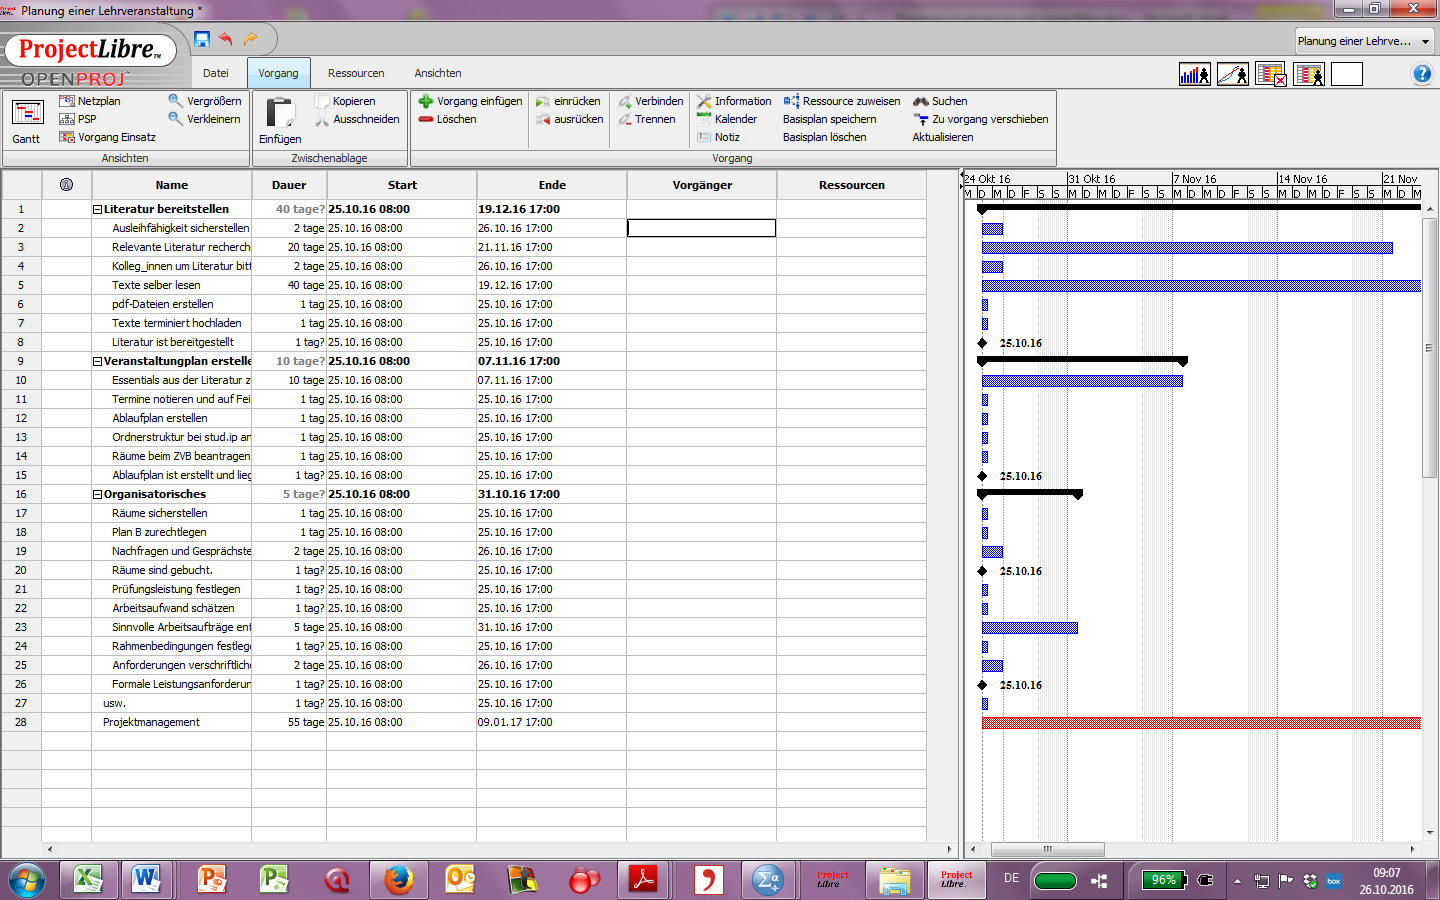
To ensure not all work processes are displayed starting on the first day of the project (which is probably not the case organizationally), “Predecessor” and “Successor” are assigned to the individual work packages or operations. In this way, the program can recognise what needs to be done at which point in the implementation process. In addition to the columns titled: “Name”, “Duration”, “Start” and “End”, there is therefore a column titled “Predecessor”. Here, the operation that must be completed before the starting of a work package in accordance with the logic of the process flow, is entered. The number to be entered can be found in the far left column.
Linkages are displayed as blue arrows.
5. Determining the duration of a work package (WP)
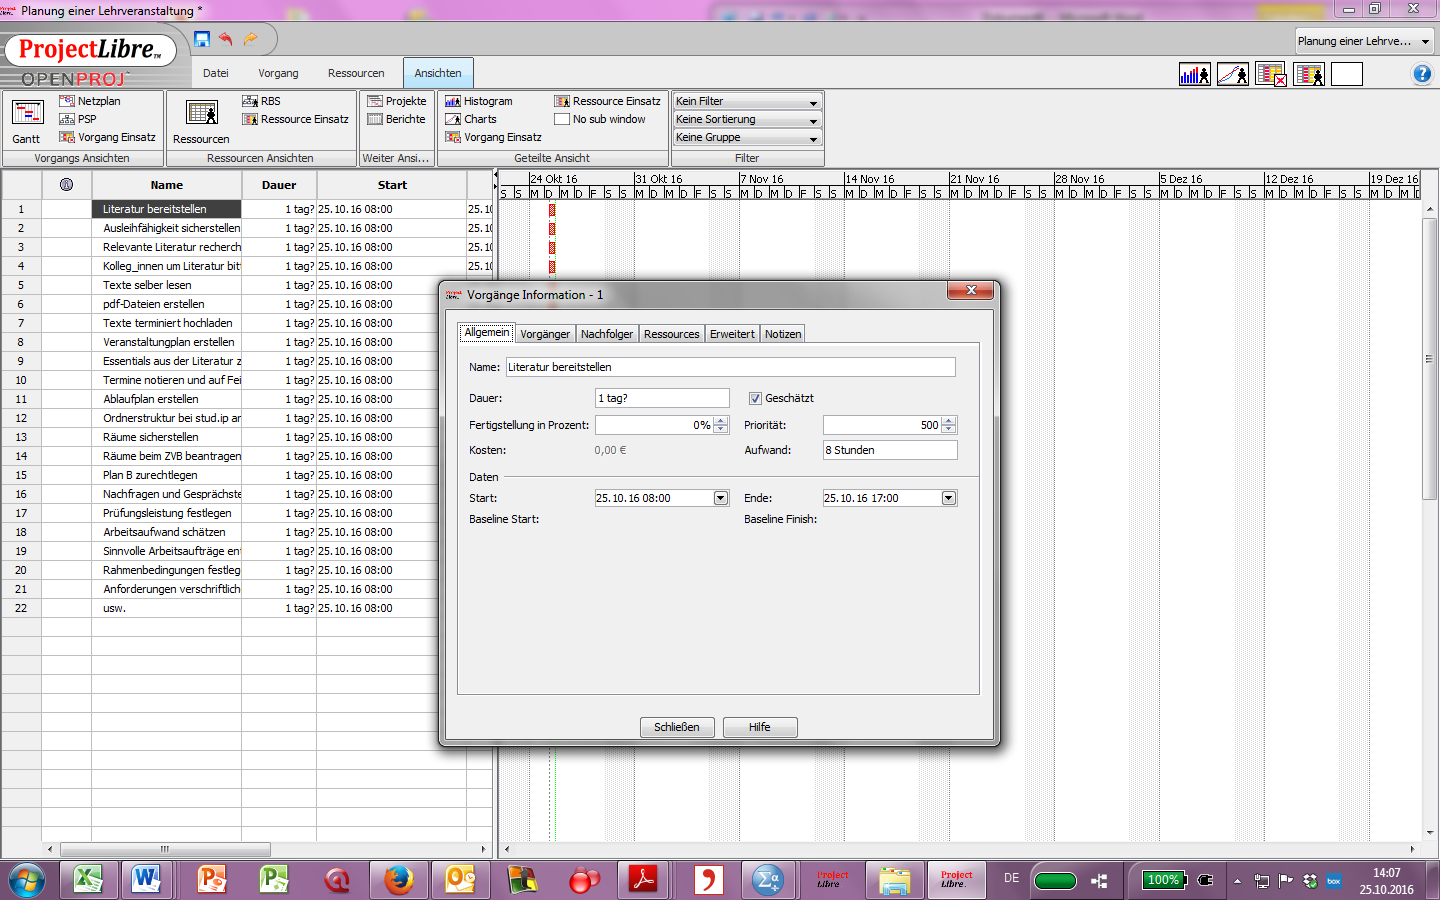

By double-clicking on a line, you can open a window in which you can enter information about an activity. Here, a work package is called “Operation” and can also be formatted using the corresponding tab. The assignment (see 4) duration and whether a milestone is involved (automatic limitation to one day, see 5) are defined for the operations. The duration of a work package can also be entered directly in the appropriate field. The total sum is calculated automatically. The duration of the work packages should already be known from the project planning. The transmission can be used to determine where the duration must be corrected. This may have consequences for the estimation of the effort. The duration can also be varied by double-clicking on the bar to be processed.
You cannot enter duration in the fields with a black displayed phase. Please do not enter dates, but only the estimated number of workdays. Otherwise, the program is not able to create the sum and inform you about possible time conflicts.
6. Creation of hierarchies
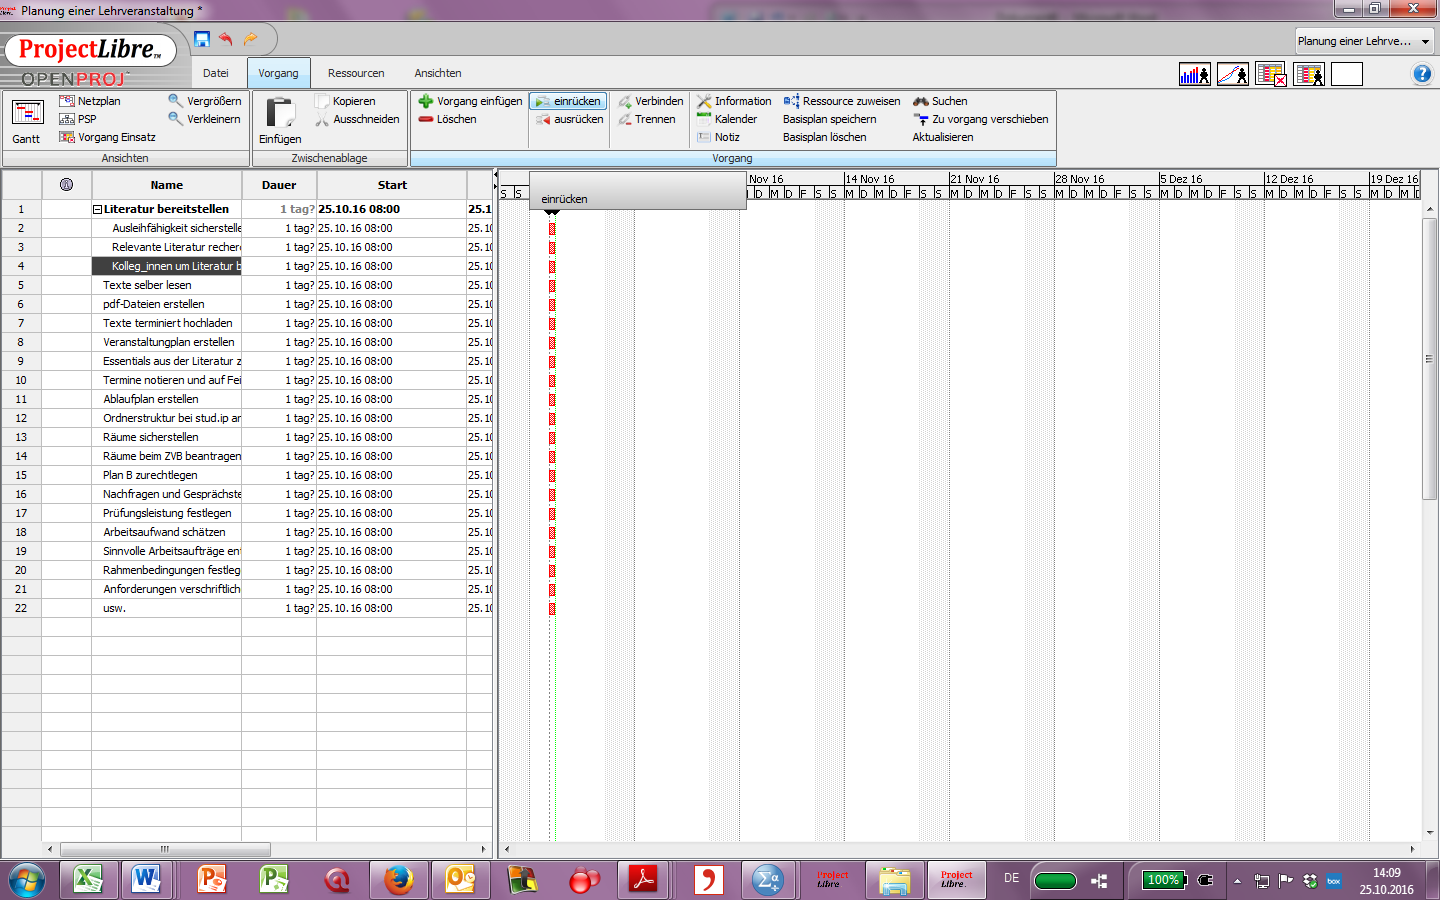
Operations must be assigned to a higher-level phase. However, the heading cannot be constructed as such, but is only created by the assignment of subordinate operations by indentation. Hierarchy takes place at the very end of creating the project structure. Otherwise it prevents the linking of higher-level activities (program restriction). The different bar types are created by the assigned hierarchy.