
Sometimes, to prepare a lesson, we need to show what we are working on at the same time. It’s typical in ICT related courses where the teacher has to show the students step by step how to do something, but not exclusive. A geography teacher could use Google Maps to talk to the students about the borders, or a math teacher could use Mathematica to solve integrals. Alternatively, they can just write the steps and record themselves doing it.
Screencast-O-Matic allows you to record your screen and your microphone so that you can make video lessons showing exactly what you need to do. The free version allows you to record up to 15 minutes, but the premium version removes this limitation and also allows you to record the system sound (i.e. the sound that the applications are emitting). You can download Screencast-O-Matic from https://screencast-o-matic.com/
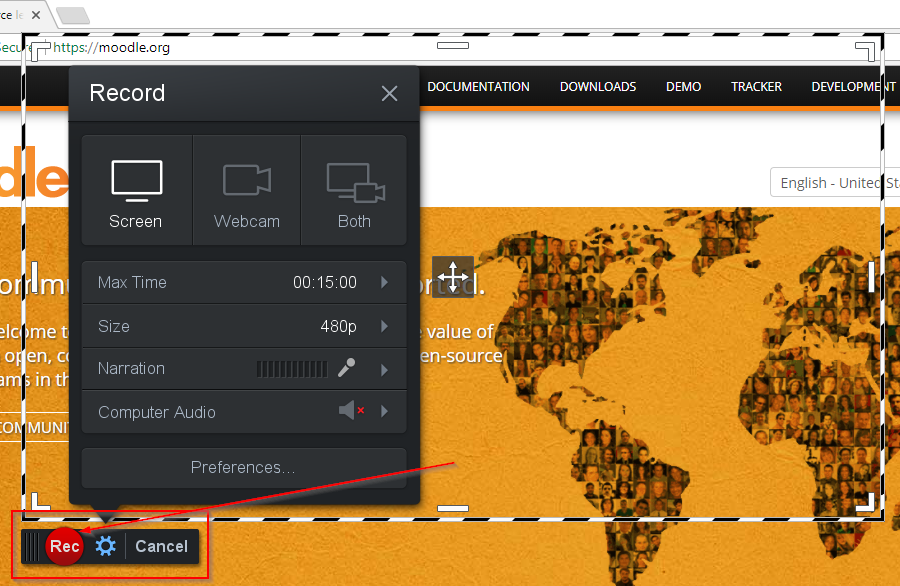
FIGURE 19: SCREENCAST-O-MATIC SCREEN
Screencast-O-Matic is very simple to use. Top bar will make us choose what to record: our screen, our webcam or both. If we choose both, our screen recording will have our webcam occupying part of the screen. Then we can modify the maximum time we can record (only in the paid version), the size (we can choose to only record the active window, or the full screen, or just part of it) and choose whether it should record our microphone (narration) and our computer audio (only in the paid version). When we have chosen our options, we shall click on the Rec button.
FIGURE 20: THE INTERFACE WHILE WE ARE RECORDING
FIGURE 21: THE INTERFACE WHILE THE RECORDING IS PAUSED
We can pause the recording once it has started, and from the paused screen we can preview what we’ve done, resume it, discard it or finish it. Once we hit Done we can save the video to our computer or publish it.
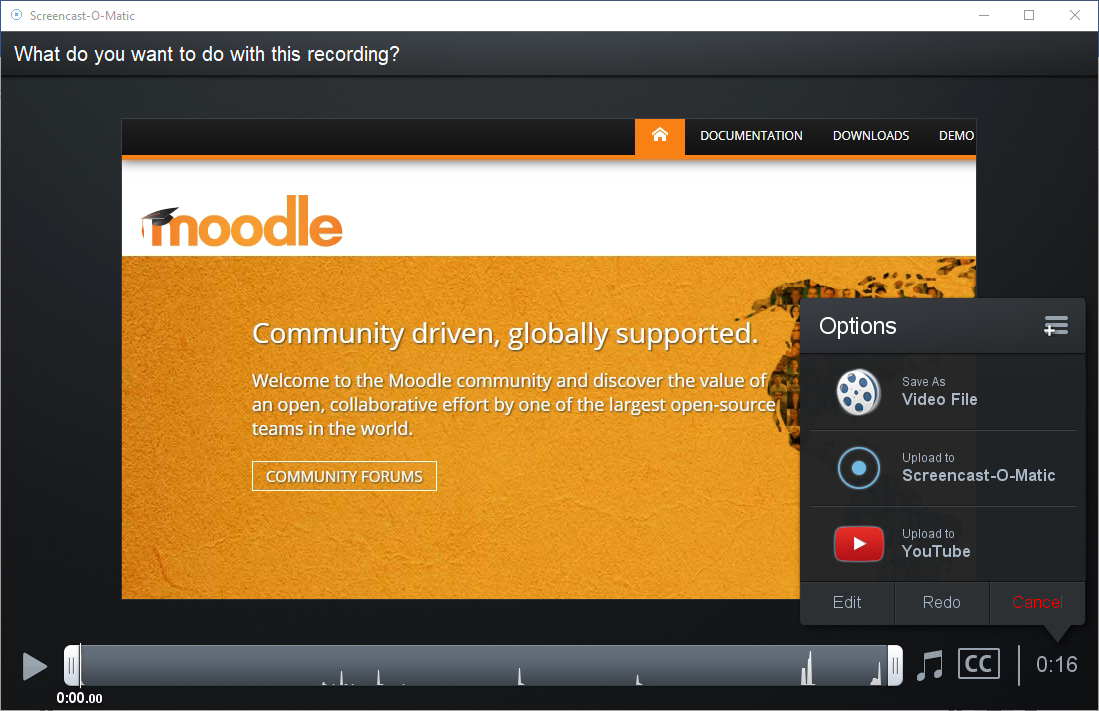
FIGURE 22: FINISHING OUR RECORDING