
YouTube is, as of today, the multimedia social platform with the biggest user base, the biggest impact and the biggest library. Because of this, having a YouTube channel can make your video lessons more accessible to your students, as well as helping them finding related content.
To access YouTube as content creators we just need a Google account. To upload a video, click on the upload button at the right side of the top bar.
Activity 4: Let us start by uploading the video we have created with Screencast-O-Matic.
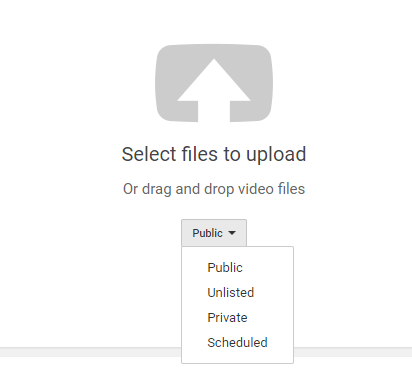
FIGURE 23: UPLOADING A VIDEO IN YOUTUBE
Uploading a video is as easy as it gets. Just drag and drop the video file into the browser window o click on the image and select it. It is also important to set the privacy right. A public video will be available for everybody, and will appear in the search if someone looks for the correct keywords. An unlisted video will not appear in any search, but will be accessible by those who have the link. A private video will only be visible for the specific users we have manually allowed.
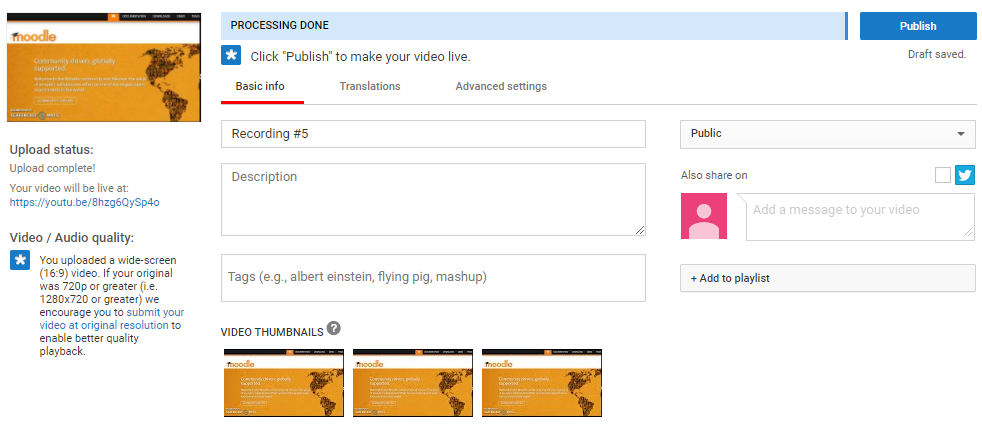
FIGURE 24: UPLOADING A VIDEO TO YOUTUBE AND ADDING INFORMATION
In the next screen, we will see the progress of the upload. We will also be able to edit the information of our video. This is important: a video with the correct description and tags will be more visible when someone is searching for something related. We finish the upload by clicking on the blue Publish button.
Now, that we have our first video, there are two more things we can do: manage our channel or further edit the video in the Creator Studio.
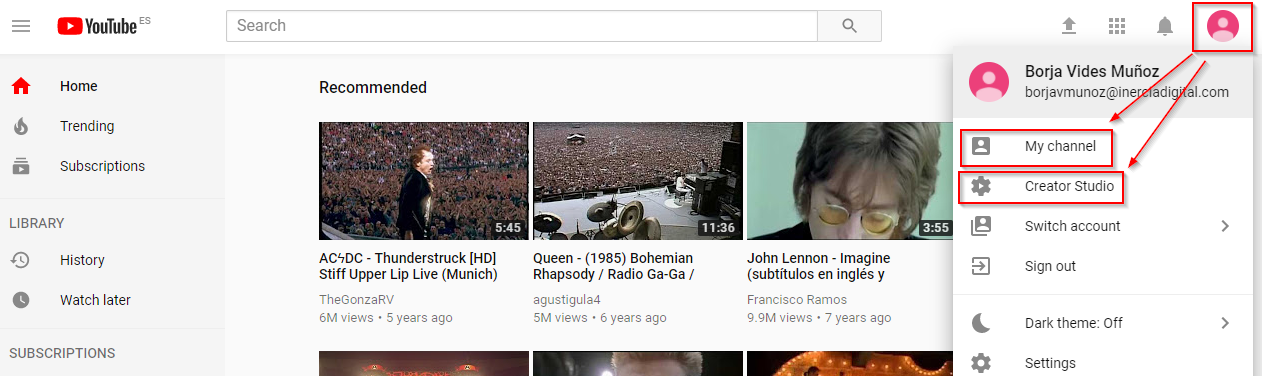
FIGURE 25: MY CHANNEL AND CREATOR STUDIO LOCATIONS
The Creator Studio allows you to modify the info of the video we previously entered, but also lets you enhance the image and the audio, replace the audio track for stock music, and add annotations and cards and one of the most important features: add or create subtitles to the video.
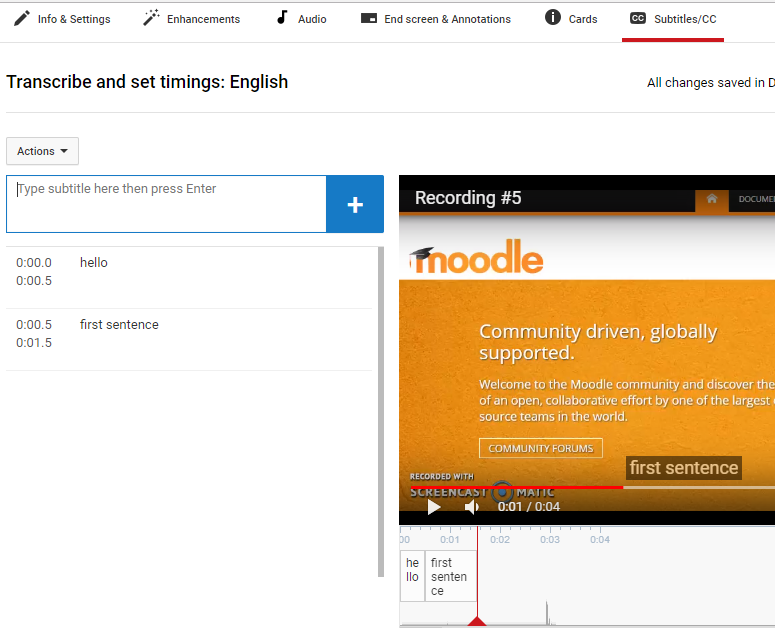
FIGURE 26: CREATING NEW SUBTITLES FOR OUR VIDEO